My First Complete Stumpwork Flower
14Jun2026
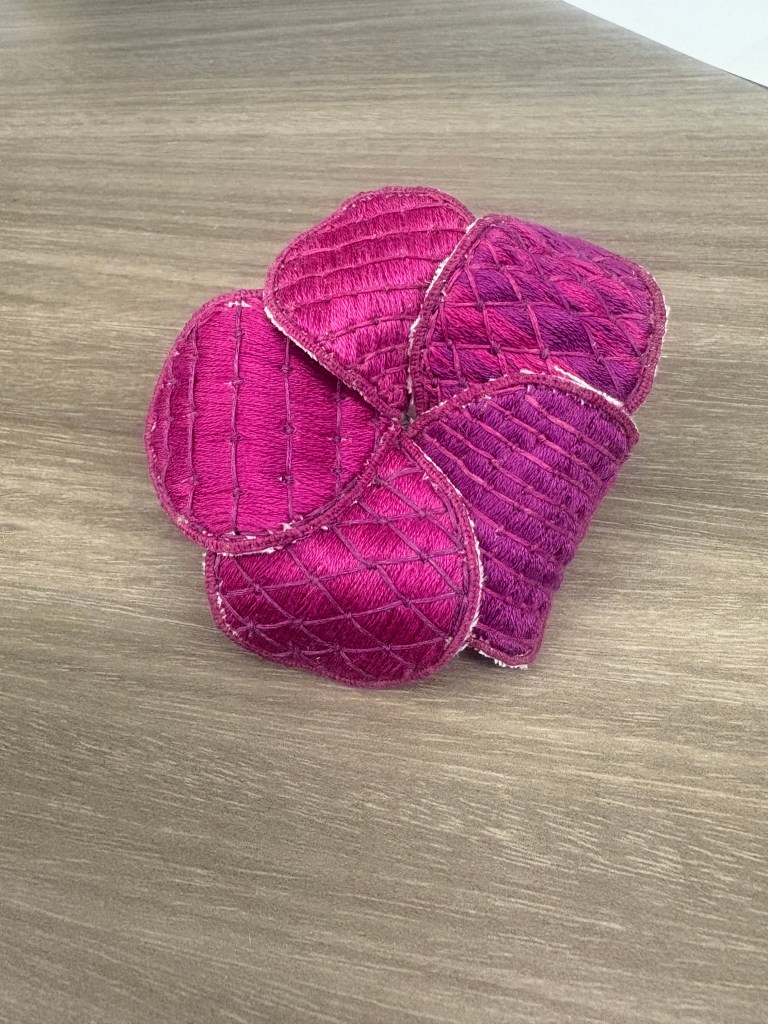
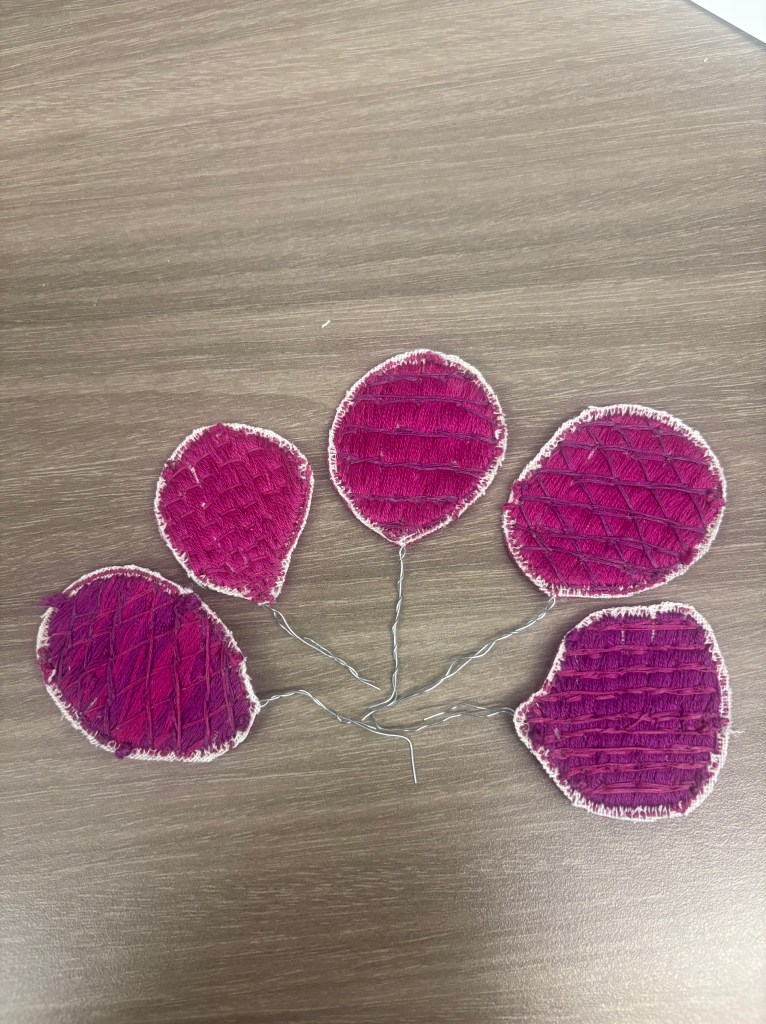
Alright friends, my very first stumpwork flower is complete!! I’m actually thrilled with how this turned out. I’m inserting photos of the finished flower now, but if you want more photos of the process and some of my breakdown thoughts keep reading.
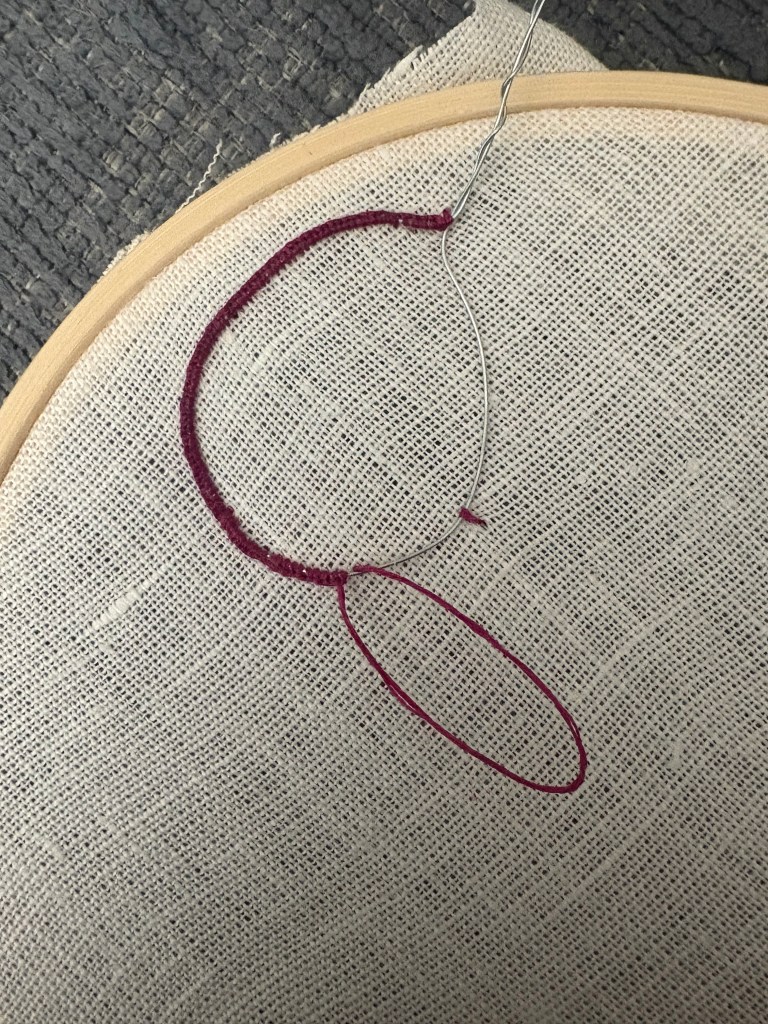
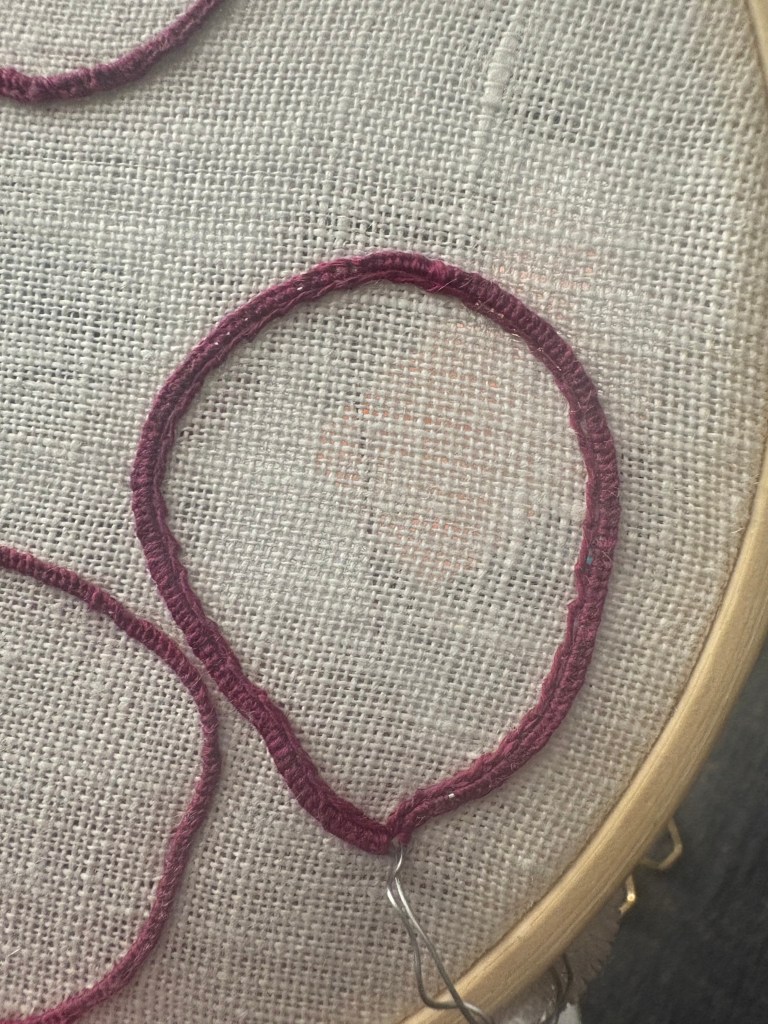
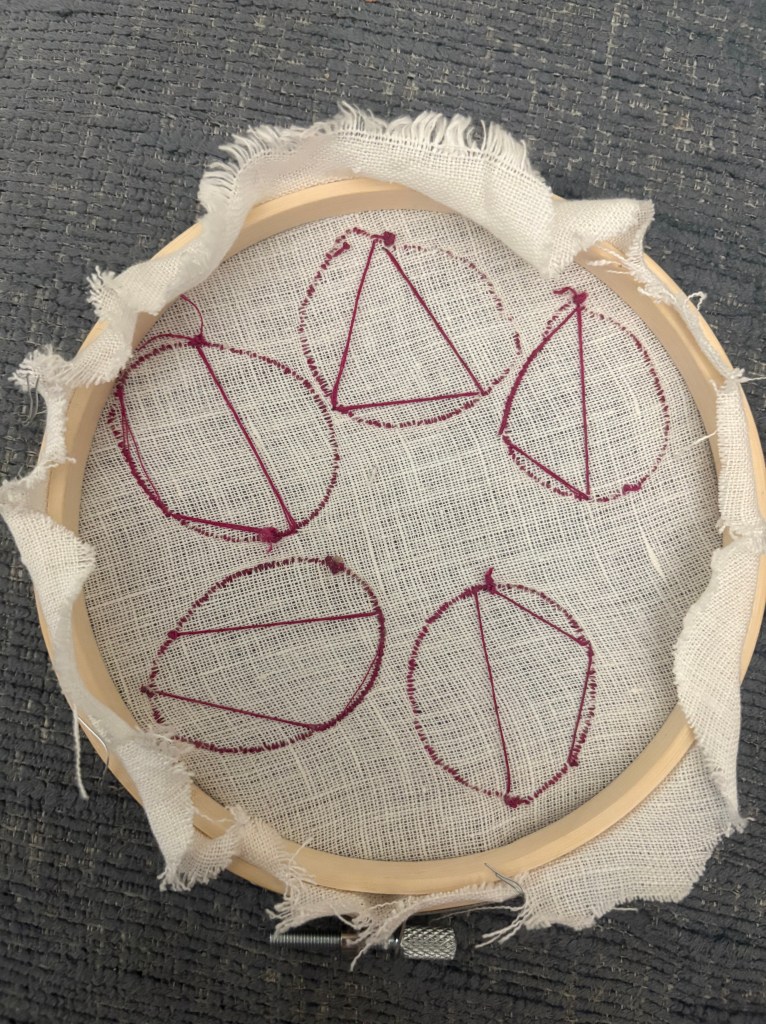
Let’s dive into the process, shall we? First, the buttonhole stitch. Remember how I said just last week that I didn’t have the patience for a 3 strand buttonhole stitch? Well…I lied. This time I used 3 strands and it worked much better. I found that it didn’t take much extra time to get full coverage of the wire slip using 3 strands vs my usual 6, so I think I’ll stick with 3 strands going forward. I might experiment with 2 or even 1 strands in future projects! Another benefit I noted by using 3 strands was that I had far fewer issues with the floss bunching and knotting. The images below show the steps of the buttonhole stitch.
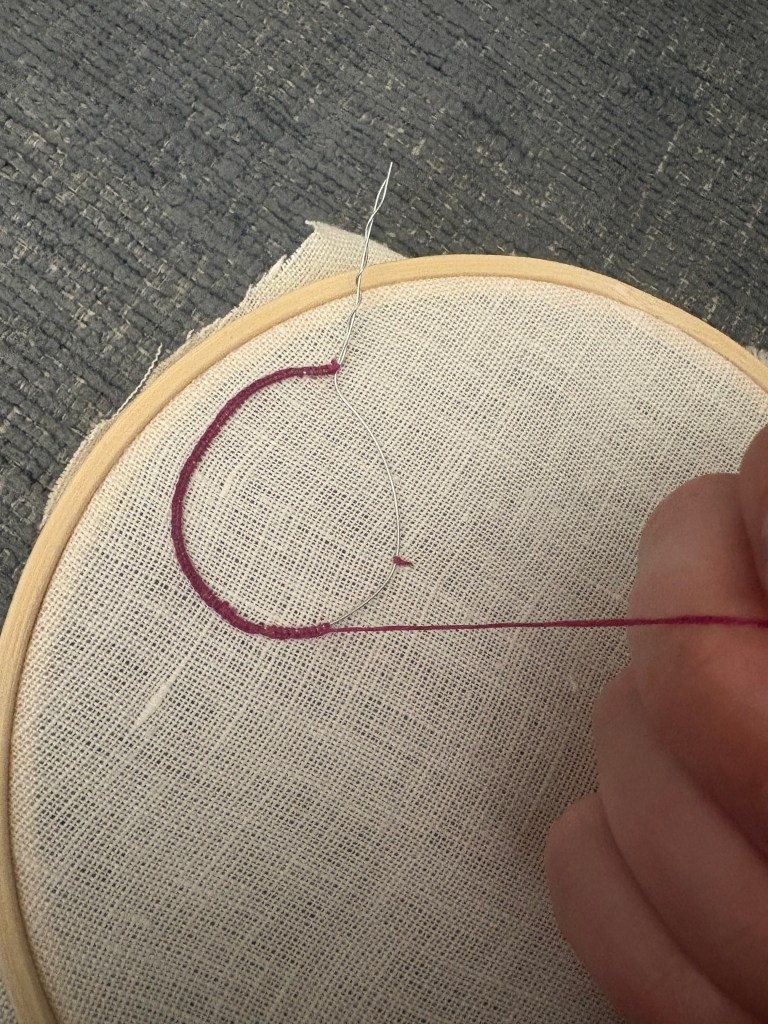
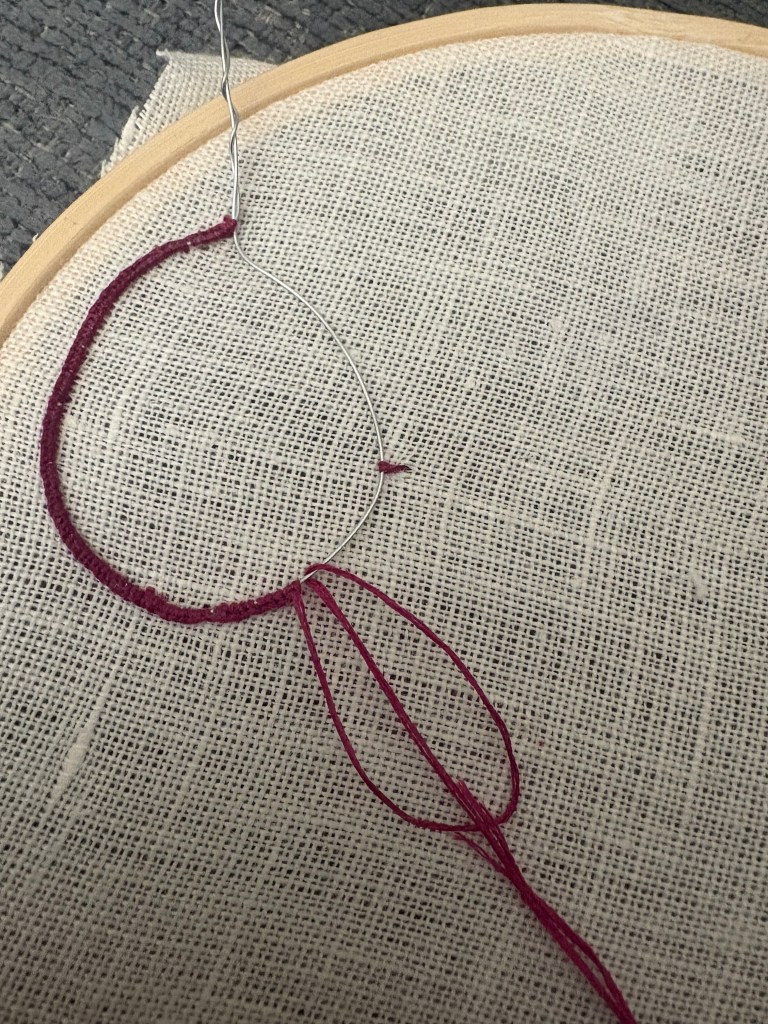
Step One: Bring the needle up on the inside of the fabric (to start, subsequent stitches will begin with the thread on the outside of the wire)
Step Two: Bring the needle down on the inside of the wire as close to the initial stitch as possible, do not draw tight yet
Step Three: Bring the needle back up on the outside of the wire between the 2 stitches you just made. Go through the loop you just created and draw tight, keeping the thread parallel to the fabric
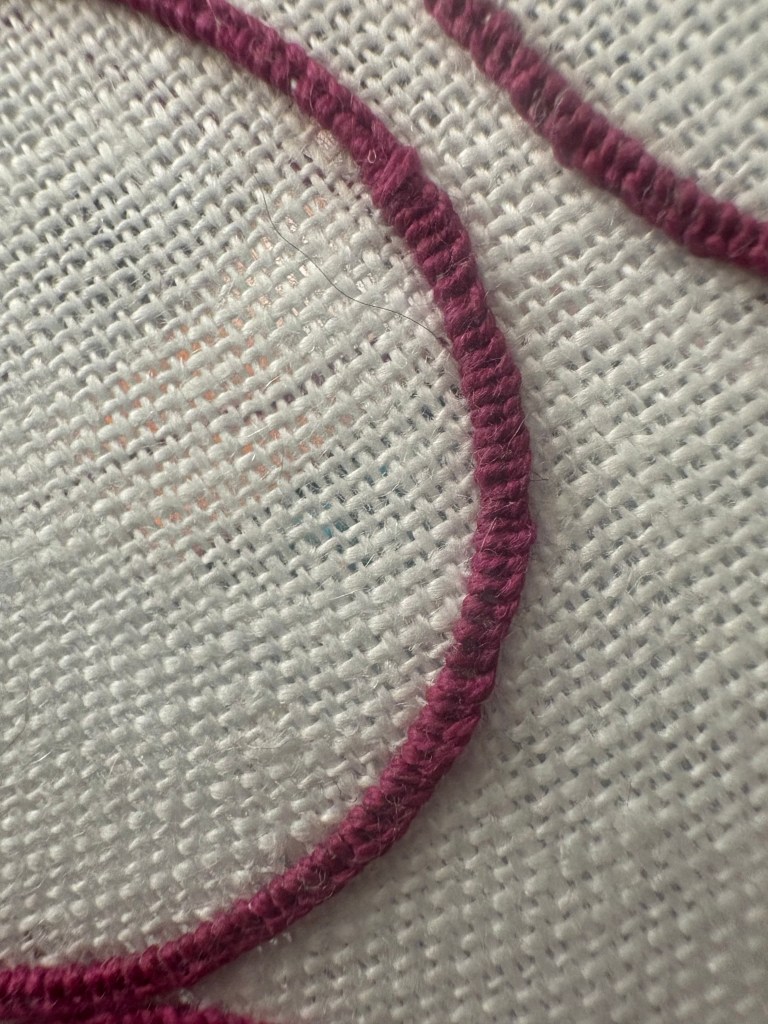
Occasionally I wouldn’t place my second stitch close enough to the others, and I would get a gap where the wire would clearly show through. To solve this, I just used my needle to push the threads closer together, and that worked quite well.
One of the main differences between this flower and the proof of concept petal I made last week is that I changed fabrics. The original petal was done on a looser woven linen, which was almost stretchy? It was a very fine weave with much thinner threads. I’m using fabrics from my scrap bin for this project so far, so I’m not sure where that linen came from. This fabric is also linen but it has thicker threads and a tighter weave; it’s the Joann’s special (I miss Joann Fabrics so much). The tighter weave fixed a lot of the issues I was seeing with the holes around the wire frame.
I did attempt a split stitch with 3 strands around my first petal, but discovered I am really not able to properly split the thread like I normally do. Most of these stitches wound up being more of a stem stitch as a result. One of the tutorials I watched did a split stitch with just 1 strand! I clearly need to up my game in that area. I found that the split stitch wasn’t entirely necessary, and so I skipped that step on the rest of the petals.
Once I got the wire slip covered for all the petals, I took some time to ponder how to fill the middle. For the original petal, I did long and short stitches (mostly short stitches), which worked well, but the back wasn’t as pretty as the front was. I wanted to make the back as close to identical as possible to the front, and so I decided to try couching and laidwork. Laidwork is where you lay down long stitches, and then sew couched lines of thread on top to hold down the long stitches.
For the first petal, I used the Bayeux stitch. I altered it a little bit though. Normally when doing the Bayeux stitch, you work a “laid stitch” which is one long stitch and you bring your needle up directly next to where you ended your stitch. I’ve seen this stitch called the “thread saving satin stitch” before as well. On the reverse, it looks like a running stitch. Instead of doing this, I used a regular satin stitch, which used a TON of thread! I used 6 strands of thread for the satin stitch on each petal. For this first petal, I proceeded with the standard Bayeux stitch from there. I decided to use 3 strands to complete the stitch. This created little running stitches on the reverse, which aren’t ugly by any means, but I wanted to see if I could fully reverse it.
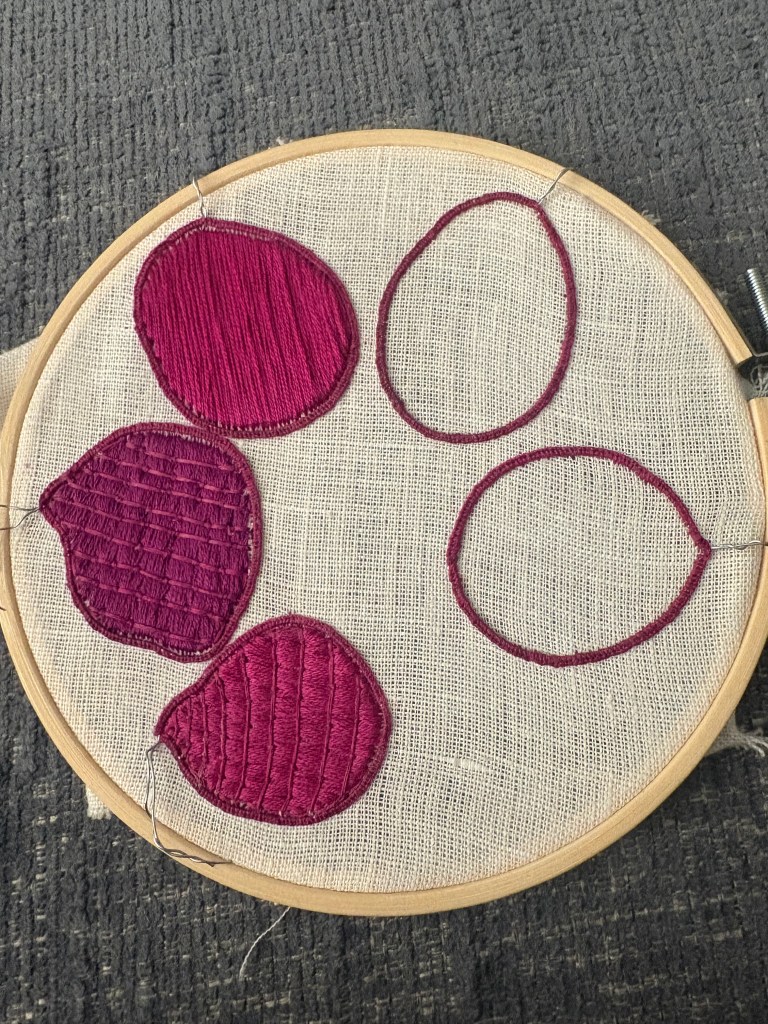
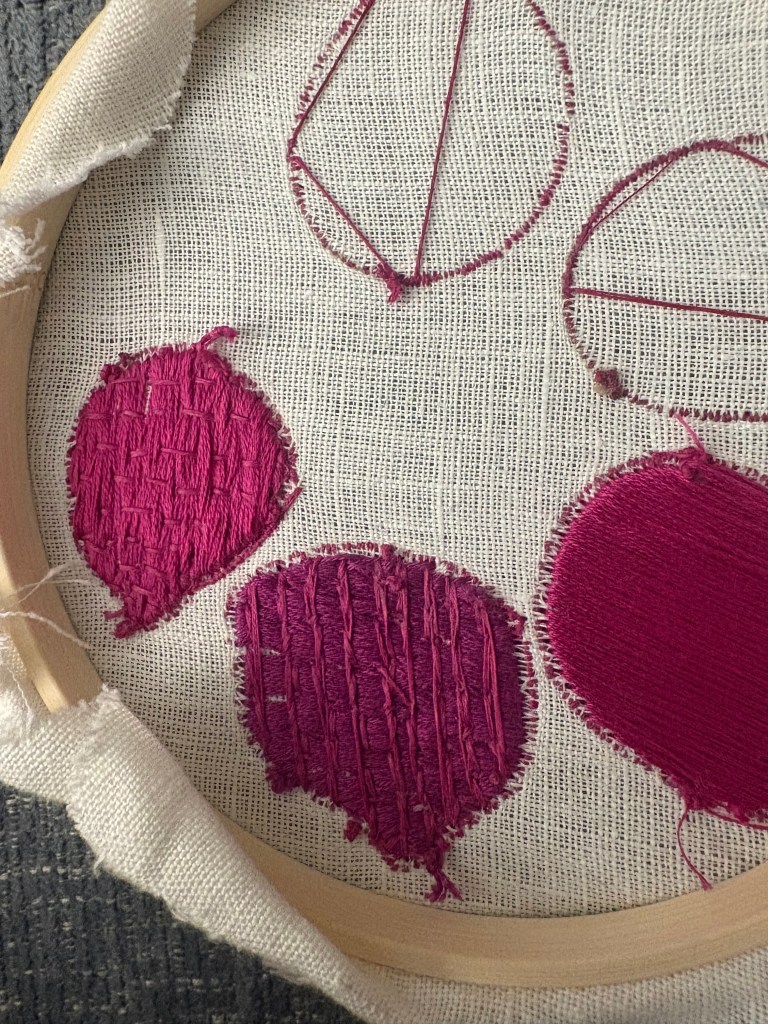
On the second petal, I accidentally used a darker purple. I didn’t realize until I was halfway through (the troubles with sewing in low light and at night), but decided to run with it anyway. I did the satin stitch, and then when I put down the thread to be couched (at a 90 degree angle to the satin stitches) I used the same satin stitch, so the thread appeared on both sides. Finally, I couched the thread down, and went around it twice instead of the usual one time so that the thread was held down on both sides. This worked really well! You can absolutely tell the right side from the wrong side, but from a distance they look fairly similar.
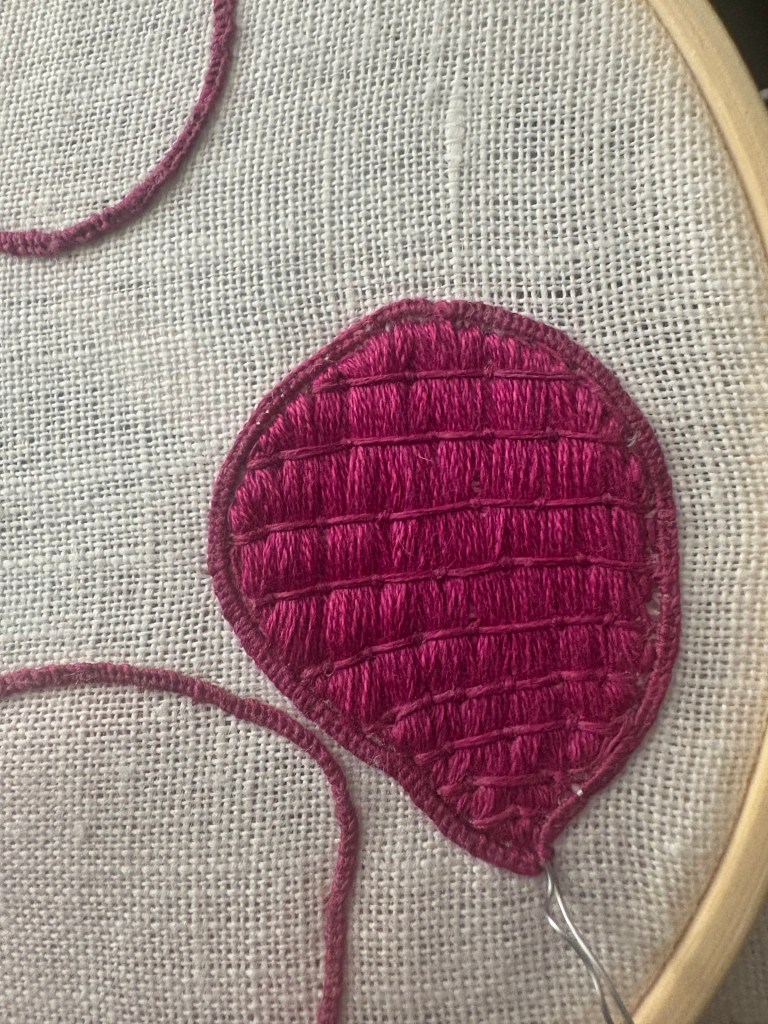
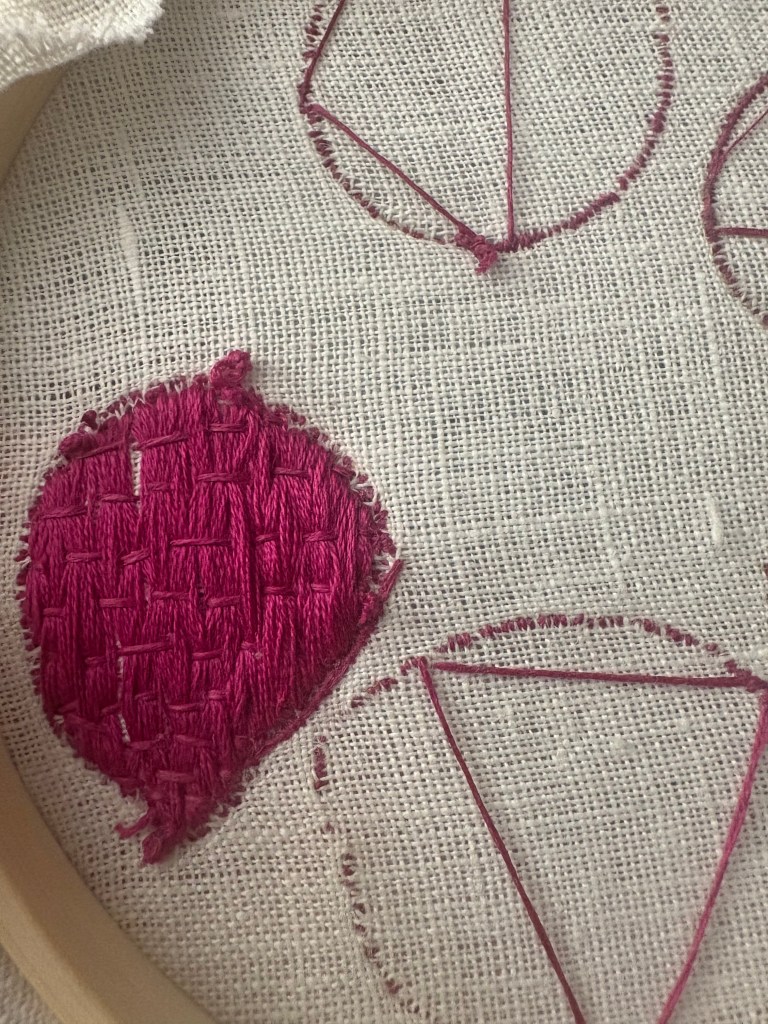
For the third petal, I felt confident and comfortable with the Bayeux stitch, so I wanted to change things up. I decided to try a trellis stitch, which came out beautifully. I think the trellis stitch was easier to reverse than the Bayeux stitch, and I like the effect it gives a lot. To add some cohesion through the flower, I used the darker purple to work the trellis, and continued to use 3 strands for the couching stitches.
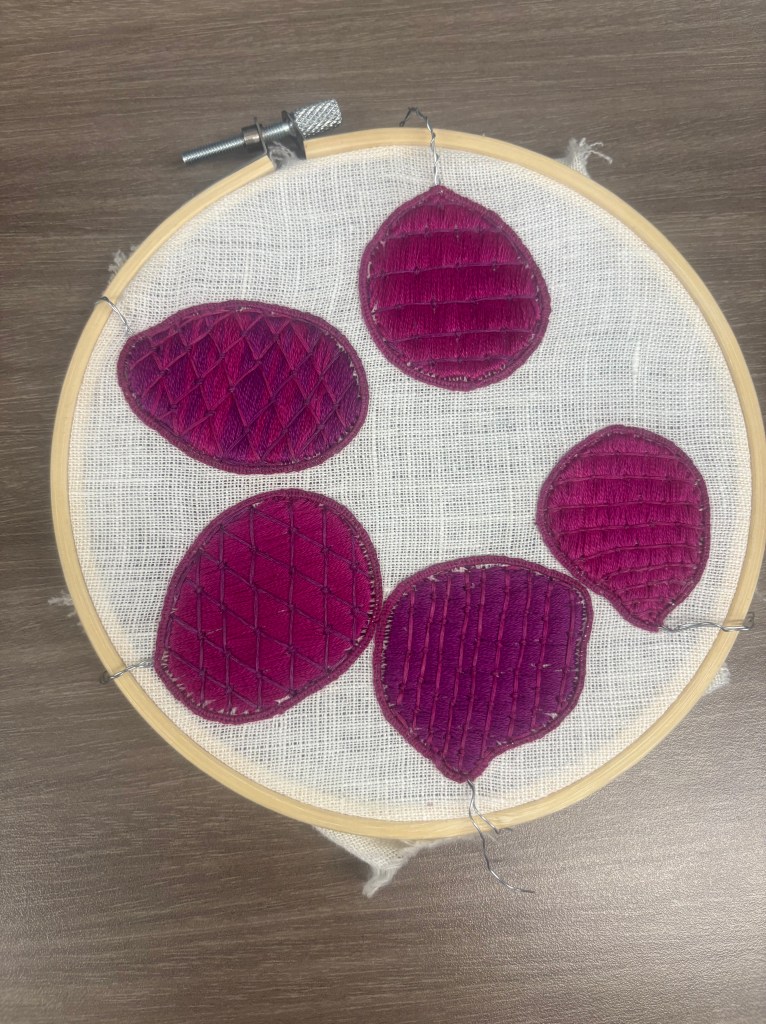

By the time the 4th petal came around I was anxious to get to the finish line. I also had 4 needles threaded with various thread counts and colors! I decided to try a gradient with the two colors, mostly because I didn’t want to play thread chicken with how much I had left of the darker purple. (I do think I would have had enough, but the gradient was fun to try.) I did another trellis stitch on top, and used a mix of the colors there as well. This turned out to be the most creative petal, and I think it ties the whole thing together nicely.
For the last petal I returned to the Bayeux stitch. I spaced out the couching threads more than the earlier two, and I like how it turned out the best. I think this petal is the neatest one, and the back certainly shows that.
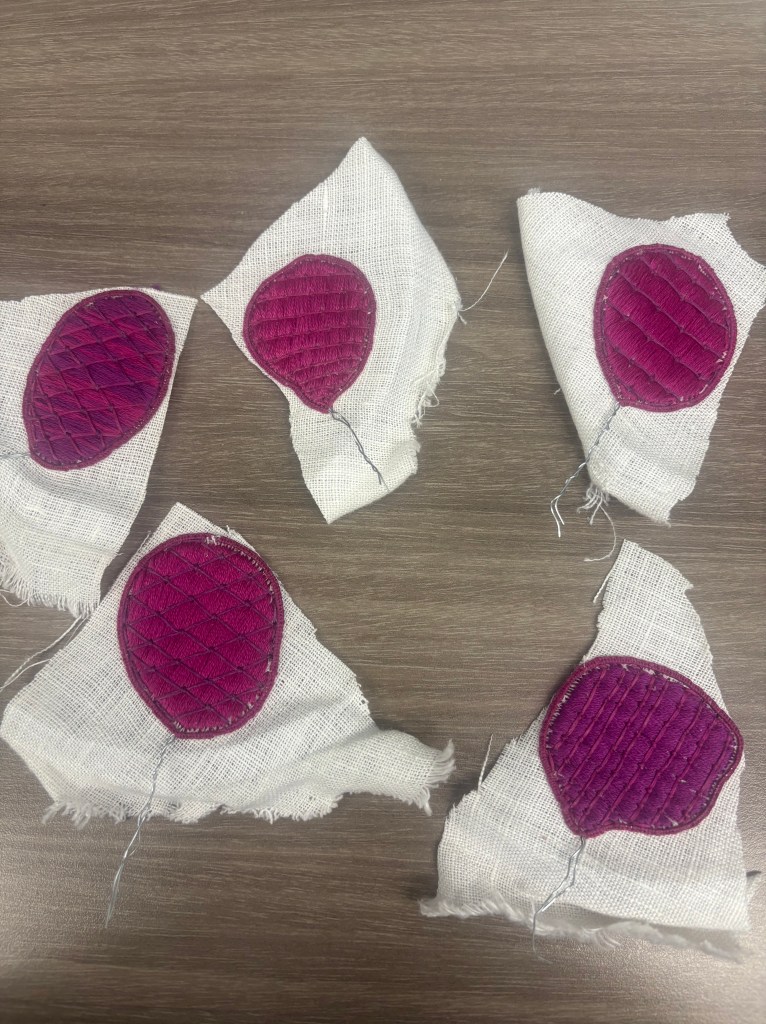
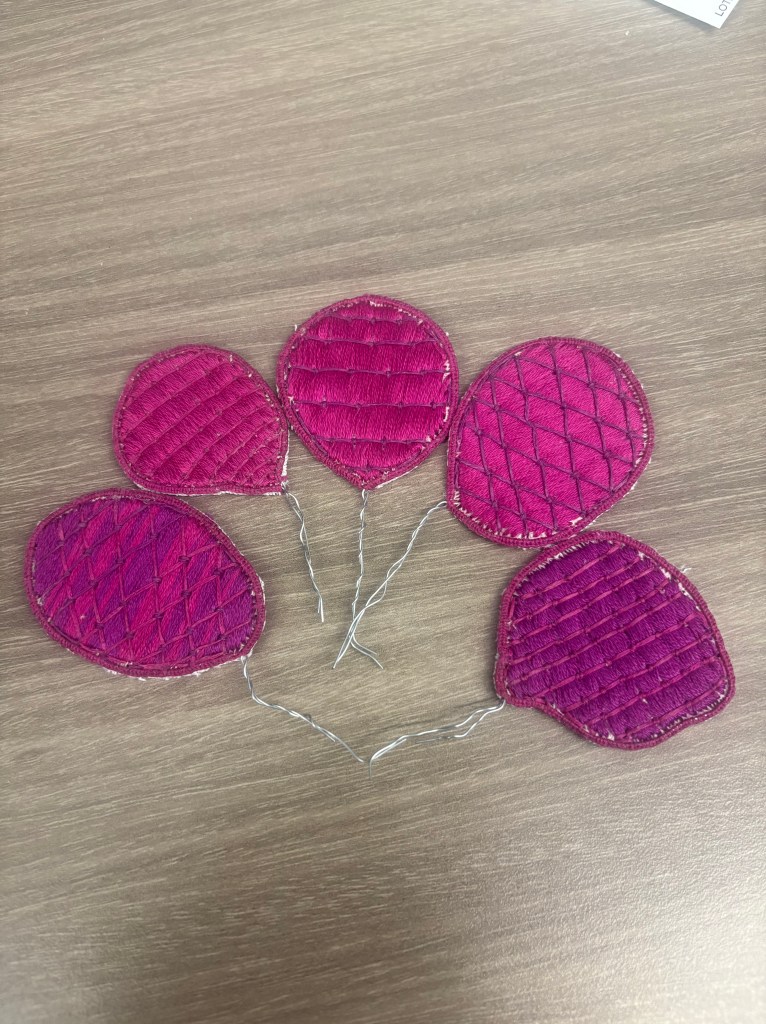
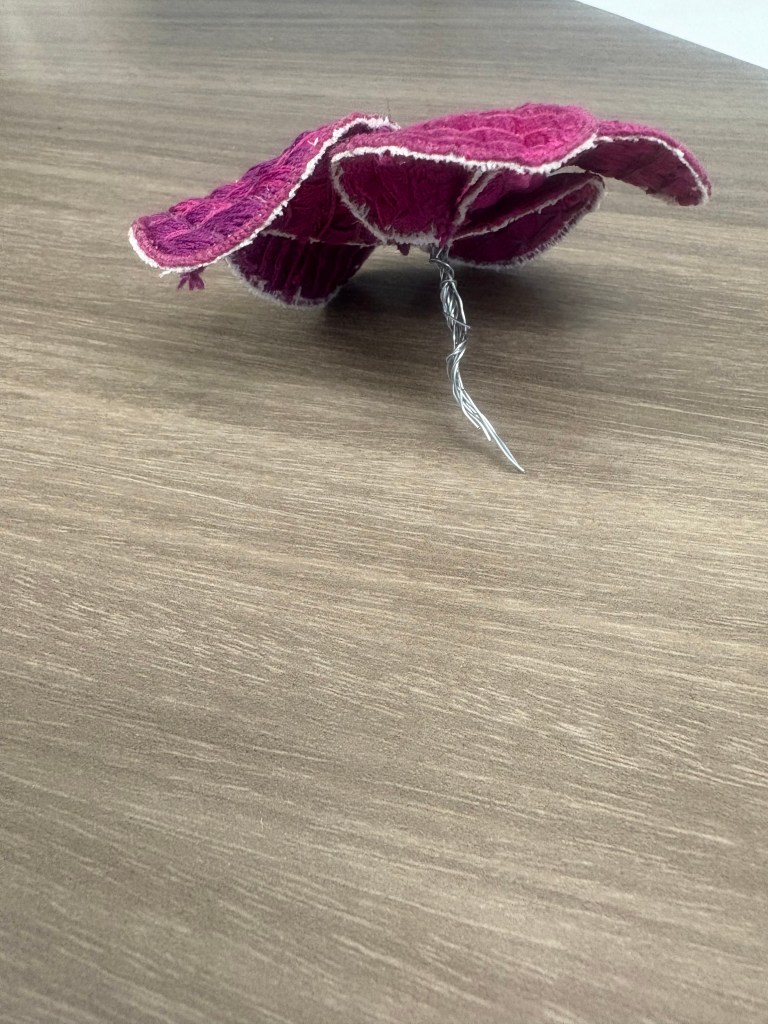
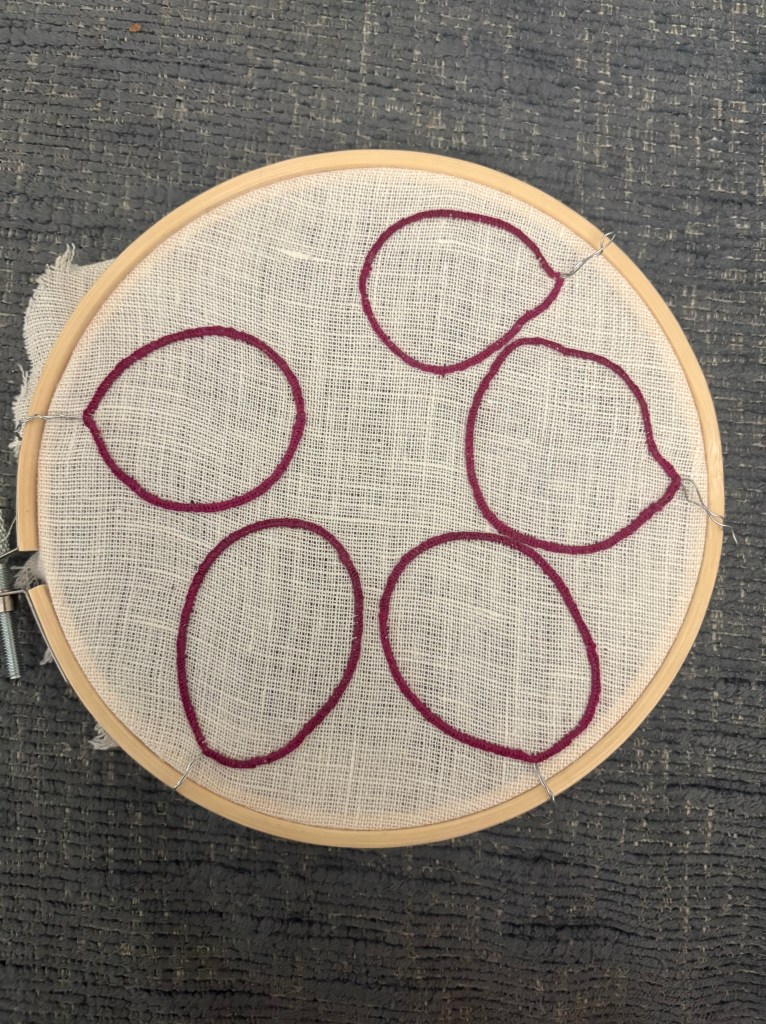
Now I had reached the end, and it was time to cut out the petals! This was nerve wracking, because I wasn’t sure all the couching was going to stand up to the free bending that the wire frames would allow. I very delicately snipped out each petal, and was delighted to find that the couching worked perfectly! I twisted the wire ends together to assemble the full flower, and bent the petals into place.
My final thoughts on the full stumpwork flower:
First, I am so incredibly pleased with it. I think the size works really well, though I could be more consistent with the size of the wire slips. There is some variation in the petal sizing, which I should be more mindful of in the future.
Secondly, I think there is some merit to matching the fabric color to the thread color, and I will potentially try that in future projects. For now though, I’d like to continue working through my pile of scrap fabrics. Finally, though I was so intent on making the fill stitches reversible, once the flower was fully assembled, I’m not actually sure it’s worth it do so, especially if I’m going to attach the flowers to a crown. Any petals that might show the back can be bent so it’s only the front showing. It will save a lot of thread if I don’t match the back, so as I make more flowers I won’t be making the back match the front. This will save a lot of time too!
A note on time…this flower took around a week of work with maybe a total of 5hrs per day? So maybe 35-40hrs of work total, give or take? I didn’t time it like I normally would, but honestly that isn’t a terrible time commitment (for me anyway). I mostly embroidered through evening TV watching and an SCA fight practice and business meeting. Therefore, I am going to set the tentative project due date as the end of August. (I need you all to start laughing now, I never follow schedules like this!) The more realistic timeline of the full flower crown is likely more like a year, but we will see. Updates will probably be slower from here on out as I work through different flowers. This is the basic process for flowers, so I won’t have much to write about unless I go rouge and try out new techniques. Next up I’m going to make some smaller blue forget me not flowers (they’re my favorite flowers!)

Leave a comment