How to Sew an Elevated Basic T-Tunic Dress
03 July 2026
Alrighty this is the inaugural sewing post! I bet you didn’t expect it to come this quickly after my forget-me-not flowers two days ago, but here we are. Now this is important so please read carefully. I know how to sew the “right way.” I disregard the right way. This blog is not going to teach you how to do things right, it’s going to teach you how to make a functional garment so you aren’t naked. There are literally thousands of resources that will teach you proper sewing methods and patterning, they are fantastic and you should search them out! Here, I’m going to teach you my method, which is Vibes Based Sewing. If you are not vibing you aren’t doing it right.
Before we start, I have an inexhaustive list of things you should do while sewing that I never or rarely ever do.
- Pre-wash fabric
- Fabric shrinks with water and heat, but do I care? Nope. Pre-washing fabric is a scam to sell you a washing machine, don’t fall for it. If you’re worried about the garment shrinking cut it like 10% bigger (stop. Do not do math. The percentage is a vibe not a measurement, you have to feel it.)
- Measurements or Math
- Yawn. Scam. Designed by Big Math and Big Tape Measure. Avoid.
- Finish seams
- I should honestly, but it takes more effort than I’m willing to put in, and if I force myself to do it, I’ll probably not sew as much as I want to. Not finishing your seams means they start to unravel on the inside of your garment, and it shortens the life of your garment.
- Ironing of any kind
- I don’t iron seams open, I don’t iron out wrinkles. I actually don’t own an iron at all. Ironing is a scam designed to sell you an iron and an ironing board.
- Seam allowances
- I think about them a little, but I don’t really measure them. Sometimes they’re wider than they “should” be, frequently they’re narrower than they “should be” it’s whatever works.
- Proper hemming
- Hems require a buddy or a height adjustable mannequin. It can be difficult to teach whoever is in arms reach how to pin and hem properly, and mannequins are expensive. The hem won’t be perfectly even but you’ll be in motion so it shouldn’t be that noticeable. Anyone who calls you out on it has volunteered to hem it for you, which is a bonus!
- Traditional patterns
- You can go out and buy those paper patterns from McCalls or Simplicity if you want. I know how to read a pattern, but honestly? You presumably wear clothes every day. Look at your clothes, look at the seams, look how it’s put together. You are holding a pattern right in front of you, and it fits you. You want to make the waist smaller? Ok cut your fabric smaller in that area. Skirt longer? Extend it out, just follow the lines. Sewing is all about shapes, you just have to be able to visualize the shapes.
I know this list fills many of you with horror and dread. Don’t sweat it, my system works for me and keeps me sewing, if it’s not for you that’s ok!
This is how to make a slightly advanced T-Tunic Dress, but this method works for T-tunics of all lengths with a bit of modification. I use this base “pattern” for most of the garments I make, so it’s pretty important. And happily, pretty easy! This method takes me roughly 2-3hrs from start to finish.
What fabric to use? This can and probably will be an entirely separate blog post, but we’ll make this quick and dirty. If the fabric is stretchy, cross it off your list. Linen is best for heat, cotton is alright, silk is really slippery and is better for more advanced sewers. Poly-blends are fine to sew with but do terribly in the heat. I’m using linen from Joann’s (may she rest in peace). The first time you do this, use an old bedsheet or something, just so you can get an accurate pattern down without potentially ruining your more expensive fabric. Some fabric has a “right” and “wrong” side, like velvets or printed cottons. Don’t use those for the first time running through this pattern.
The Math Section
Typically math is banned. It’s not fun, I don’t really have a head for numbers, and therefore I don’t really use it. However there are a few exceptions to the math ban, and here they are.
Ready? You need 2 measurements. I’ve drawn little pictures for you, but I am not an artist, don’t make fun of my advanced stick figures!
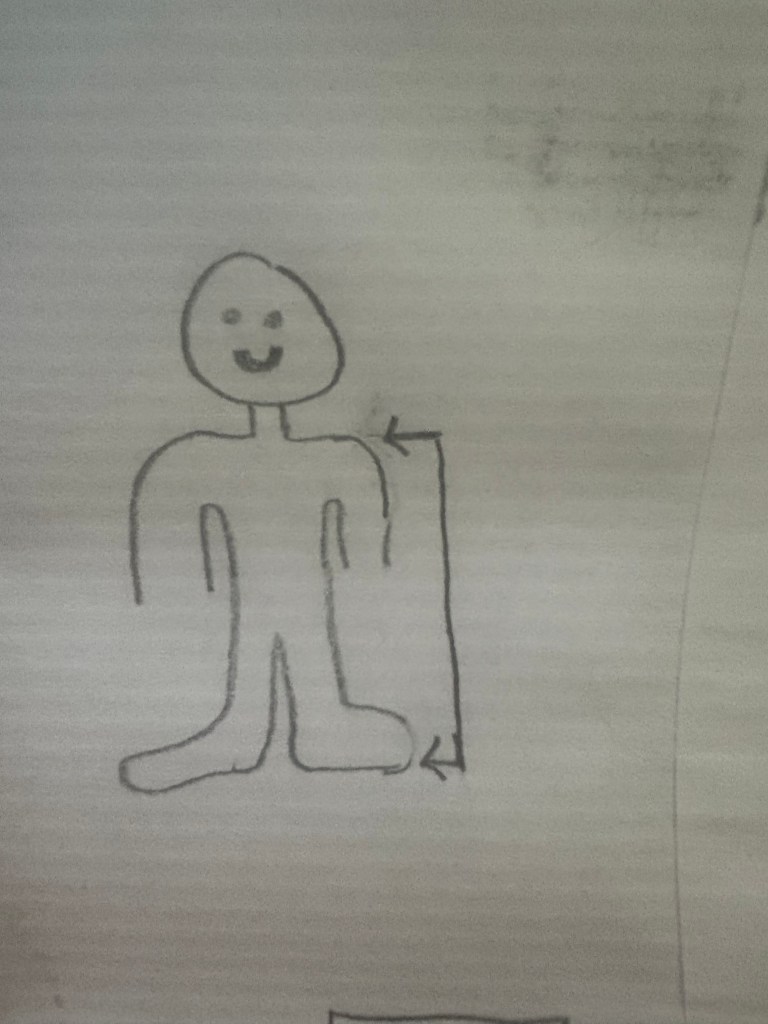

First, you’ll want to measure from your shoulder to wherever you want the dress to fall. I measure shoulder to floor. Got the measurement? Double it, then go to google and convert to yards. All fabric measuring is done in yards, don’t ask me why. Save that measurement, it’s how many yards of fabric you need to buy. For me, this measurement is about 3.5-4yds (I’m 5’3″). Now you stand with your arms out in the T pose, and measure starting where you want your sleeve to end, across to the other arm where you want the sleeve to end. This measurement is just a rough one. Fabric is sold in a few standard widths, you’ll want to pay attention and choose the width that is closest to this measurement.
Ok that’s it, math over. Now we vibe!
The Folding Section
So you’ve got your fabric, and you’ll have a rectangle. Fold the fabric hamburger, then hotdog. You should have 4 layers of fabric. This is important, DO NOT CUT ON THE FOLD.
Now you’ll need a “pattern piece.” I recommend a t-shirt that fits on the baggier side. If you only have tight t-shirts, just cut way wider. Keep in mind that t-shirts stretch, your fabric won’t. You can always sew something smaller, you can’t add material (ok…you can…that’s a different blog post though). Take your t-shirt and fold it in half hotdog style. Lay it on your fabric, lining up the middle with the long fold, and the shoulders with the top fold. It should look like this:
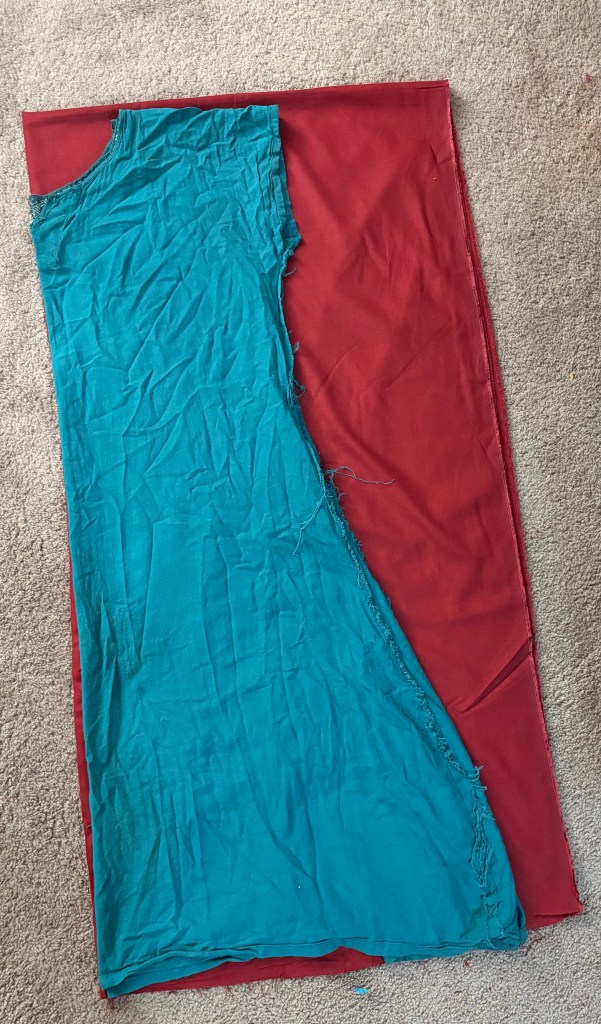
I will also make a small note here. Do you see how the inside seams on the teal dress are fraying and unraveling? That’s why you’re supposed to finish your seams.
Alright, stand back and look at your work. Check in, are you feeling nervous? We’re about to cut fabric. This is a good point to have an existential crisis or a panic attack. Feel free to take a walk, grab a snack, and calm down. I’ve made tons of garments and always panic a little at this stage.
The Cutting Section
Ok panic time over, grab those fabric shears. Your t-shirt arms are probably not going to extend to the edge of your fabric. Draw an imaginary line (or grab chalk, or put pins in) to extend the sleeve to the edge of your fabric. The line doesn’t need to be perfectly straight either, I see you, put away the ruler. Remember your seam allowance! “How much is a seam allowance Shea?” I have no idea. You’ve gotta feel the seam allowance. I try and keep mine pretty wide, I use the tip of my pointer finger to the second joint. Don’t over think it.
Start cutting. Straight-ish for the sleeve, ease around the curve for the armpit, down to your natural waist. “Where’s your natural waist?” ”How far down?” Stop. These are math questions. It’s your body and your t-shirt. Where on that t-shirt is your natural waist? Where do you want the skirt to start being a skirt? Around that zone, begin to angle out towards the edge of your fabric. You’re essentially cutting out a triangle from your rectangle, do you see it?
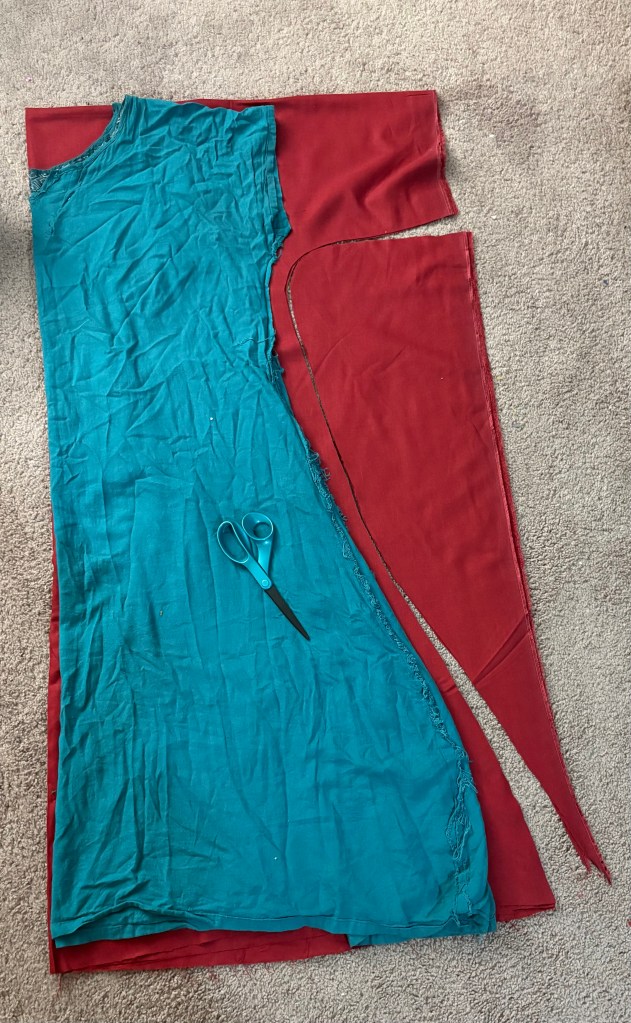
Now the neck hole. There is a “right way” and a “wrong” way to do the neckline. We’re going to do the “wrong” way which is also the faster way. One day I will do a blog post on the “right” way to do this, but not today. Cut an arc. Smaller is better, if you cut the hole too big it’ll fall off your shoulders and you will be sad. The teal dress I’ve been using as a pattern suffers from this problem, so I swapped to an old reliable one.
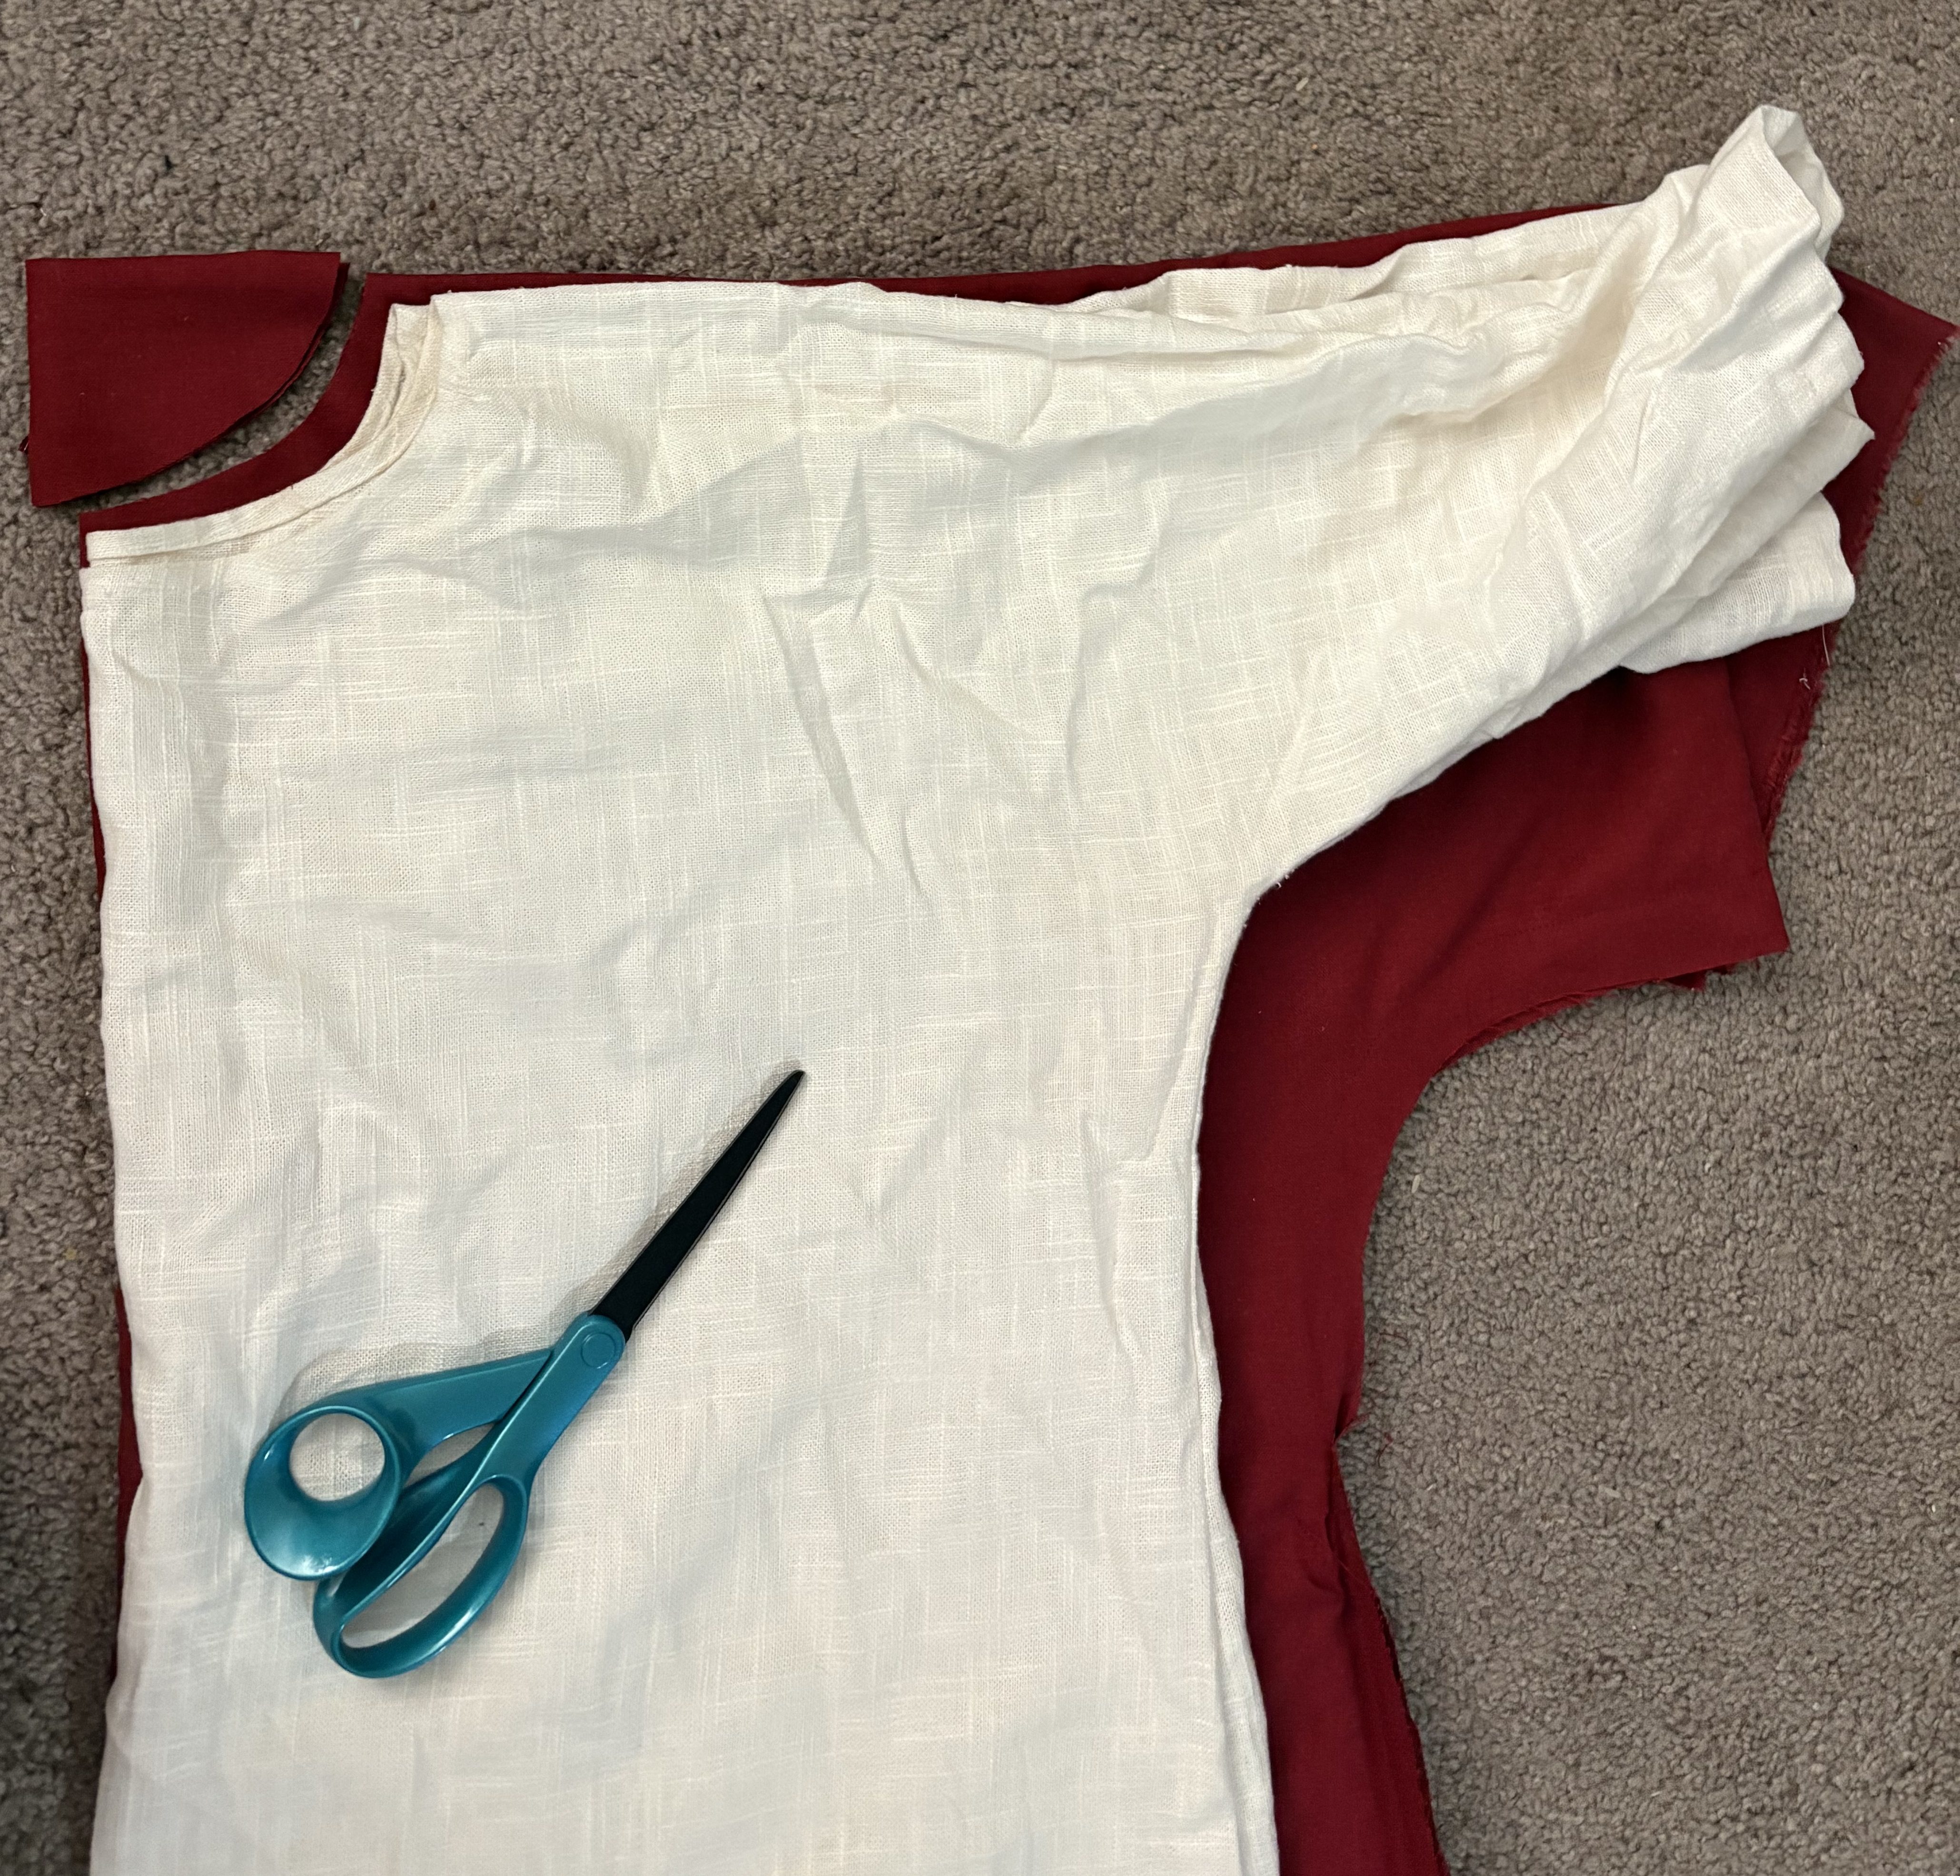
Now remember, your t-shirt stretches, your fabric does not. Your head is probably not going to fit through the hole you just cut, so you’ll need a slit. This will denote the front of your garment. Slide your shears carefully so you are cutting one layer, right on that fold line. I cut about the length of my shears, and then a bit more if I want a deeper slit. If you’re still experimenting, you can try on the garment now to make sure it’s right.
Nice job, cutting is done. At this stage, you can pin the top two layers and the bottom two layers, sew up your edges, hem, and be done. I do that frequently, especially for under-dresses. However today, we’re going a bit more advanced and adding width to the skirt.
The Pinning Section
Without moving any fabric, pin the top and bottom 2 triangles together. Sew them together. You’ve gone from having four right triangles to two equilateral-ish triangles. Now before you picked up the fabric to sew it, the narrow part of the triangle was by your feet, and the long part was by your sleeves. Flip the triangle. The narrow part should be by your natural waist and the wide part should line up with the bottom hem. Scoot the fabric around until it lines up, and pin it.

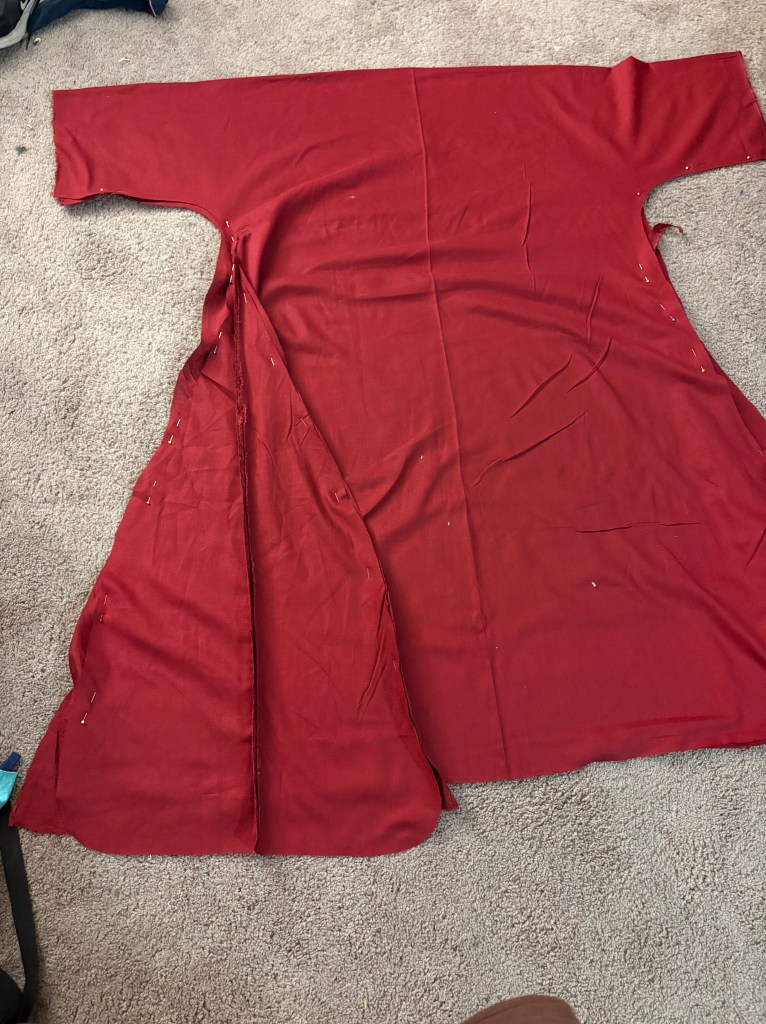
It’s ok to have an existential crisis here too. Remember, you’re working on the “wrong” side of the fabric right now, so you’ll want the raw seam on the triangle to continue to be on the outside, visible to you. If you mess that up it’s not the end of the world, but it is annoying.
The Sewing Section
Your pins are in place, it is time to sew! “Oh god Shea, there are 3 seams meeting, what do I do?” Dude I literally don’t know. It’s awful every time I do it. There is a method, I’ve taken classes on this method. I do not do the method. You’ve just gotta move the fabric around and seam rip if you get it wrong, or hand sew the top part where the 3 seams meet. Feel free to panic, but know that the panic in this moment is only delaying the inevitable. I try to have what I call “mobile panic” in this moment, where I’m going while panicking, as opposed to frozen panic.
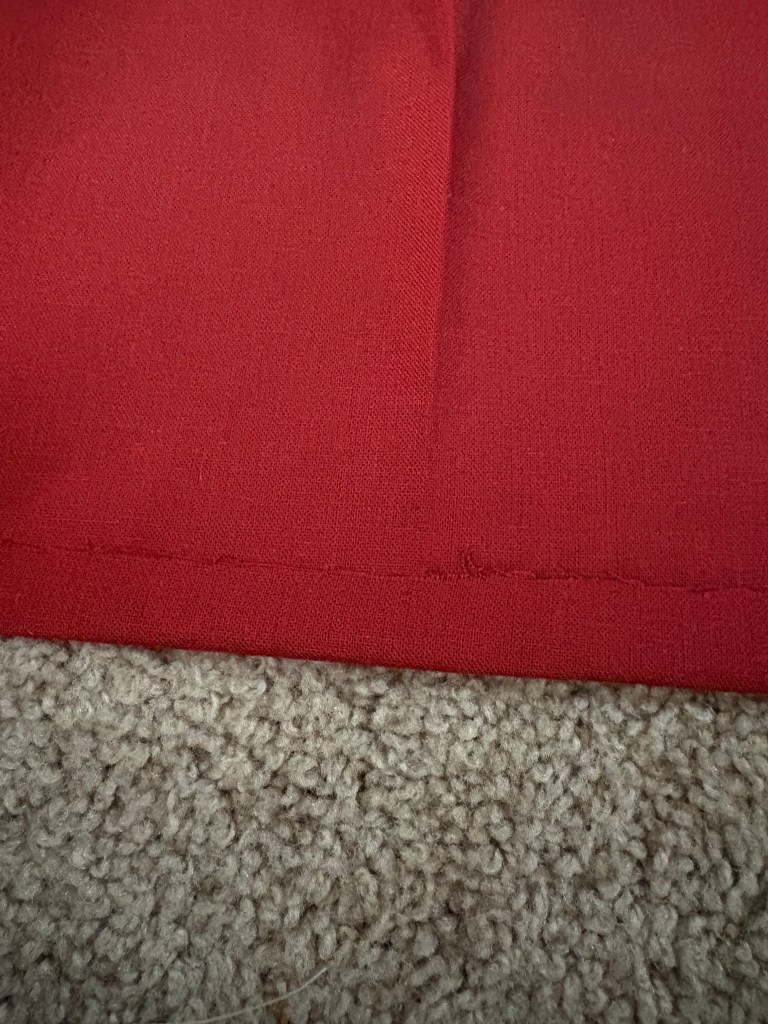

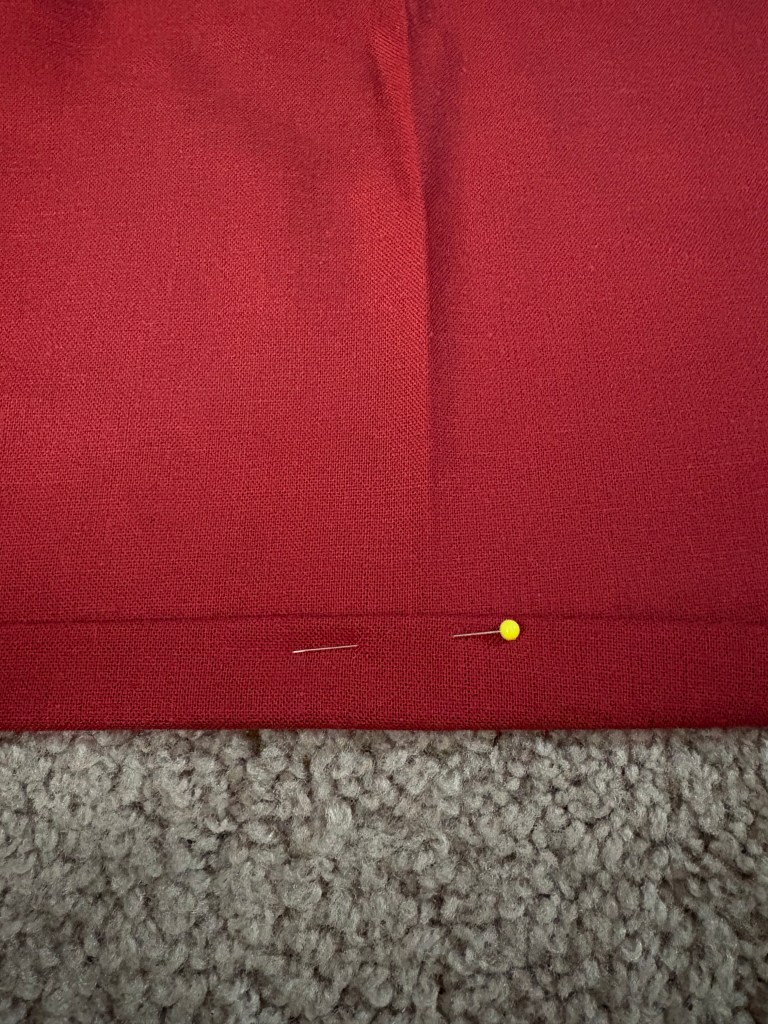
Once you’re past that, it is time to hem! We are in the home stretch here friends. Flip the raw edge of your fabric up once, then again. You shouldn’t see any raw edge. Pin that. Repeat all around the bottom hem. “How much?” It depends really, I like my dresses LONG, so my hems can be relatively narrow. I keep it between one and two joints on my pointer finger. If the width of your hem varies don’t worry about it. The fabric will stretch out unevenly anyway, and it’s basically impossible to do a straight hem on yourself. Not one of my garments has even hems, it does not matter.

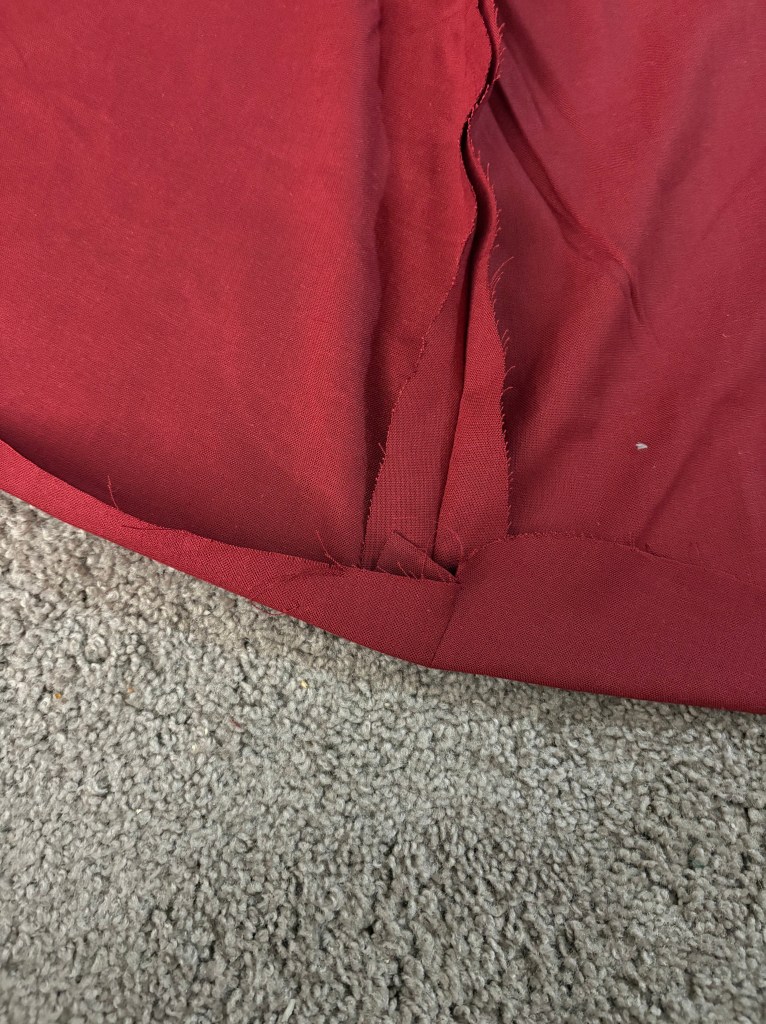

When you come to a seam, make sure you press the seam open and keep it even as you roll up and pin the hem. You can see in that third image where the hem width changes and I move from one piece of fabric to another.
Next, head on up to your sleeves and roll those edges too. Try and keep the width even between the two sleeves, it is more noticeable here. Then the neckline. This one might give you issues because it’s a round shape. Keep the hem as narrow as possible, and try and move any wrinkles and bumps to the back. You won’t be able to get the very bottom of the slit, just backstitch over it a few times when you sew the hem and that’ll prevent most of the unraveling.
Sew up your hems, and you are done!!
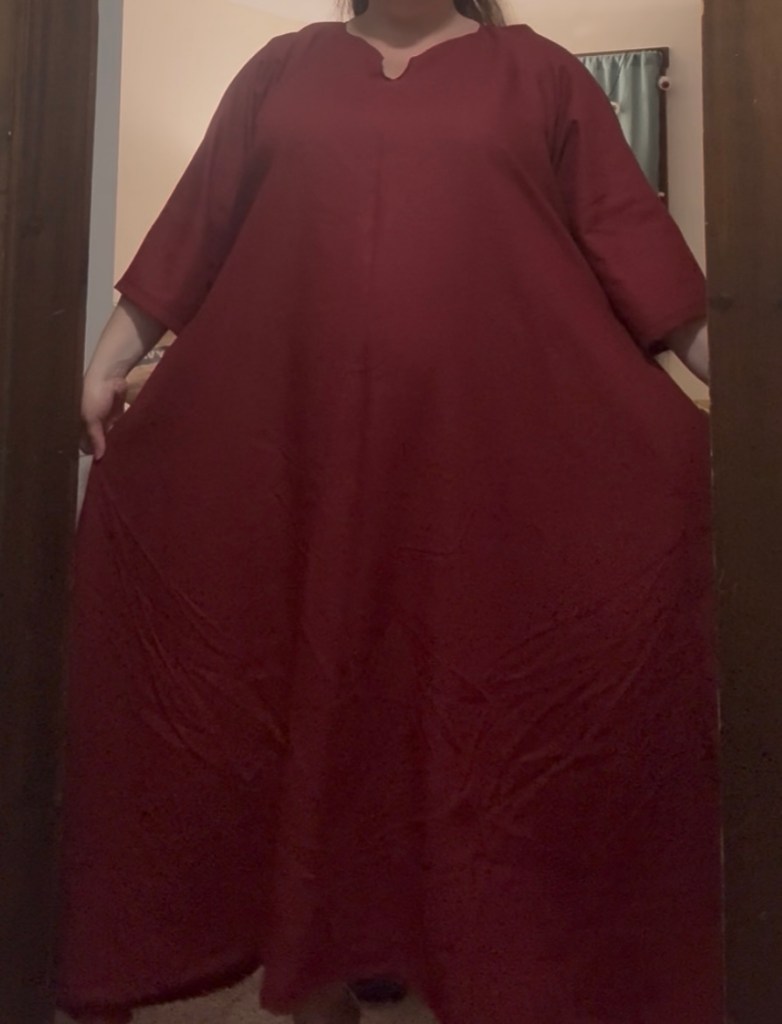

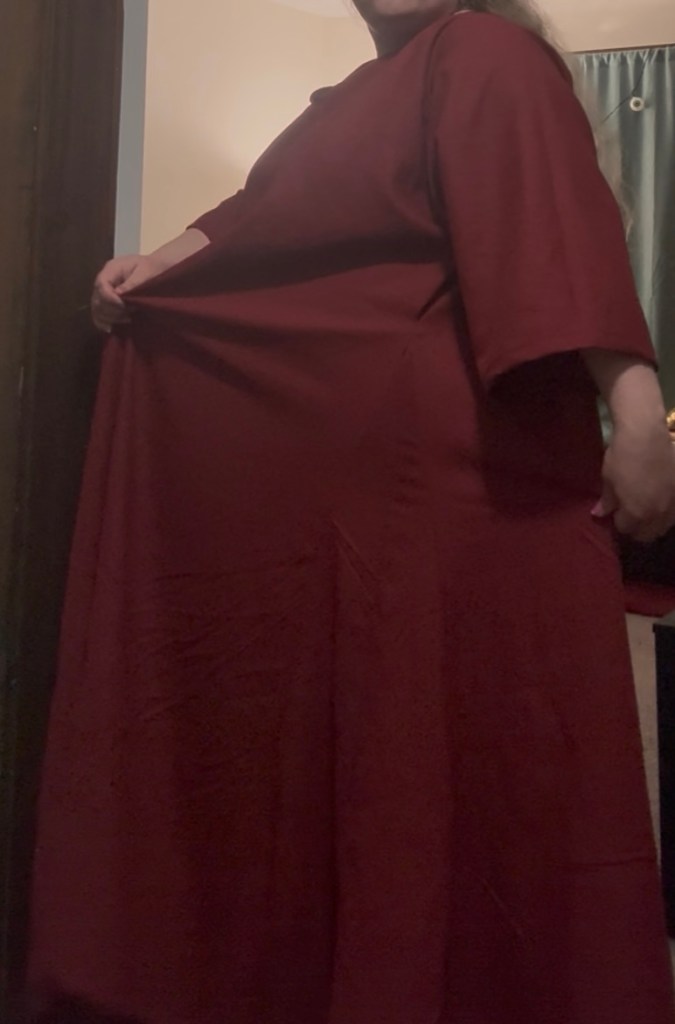
Congratulations, you’ve made a functional garment!! Is it perfect? No. Is it going to last forever? Also no. Life is short, fashion is temporary, and anyone standing close enough to see the flaws is too close and owes you rent for the privilege. Anyone tactless enough to mention the flaws owes you a new garment.
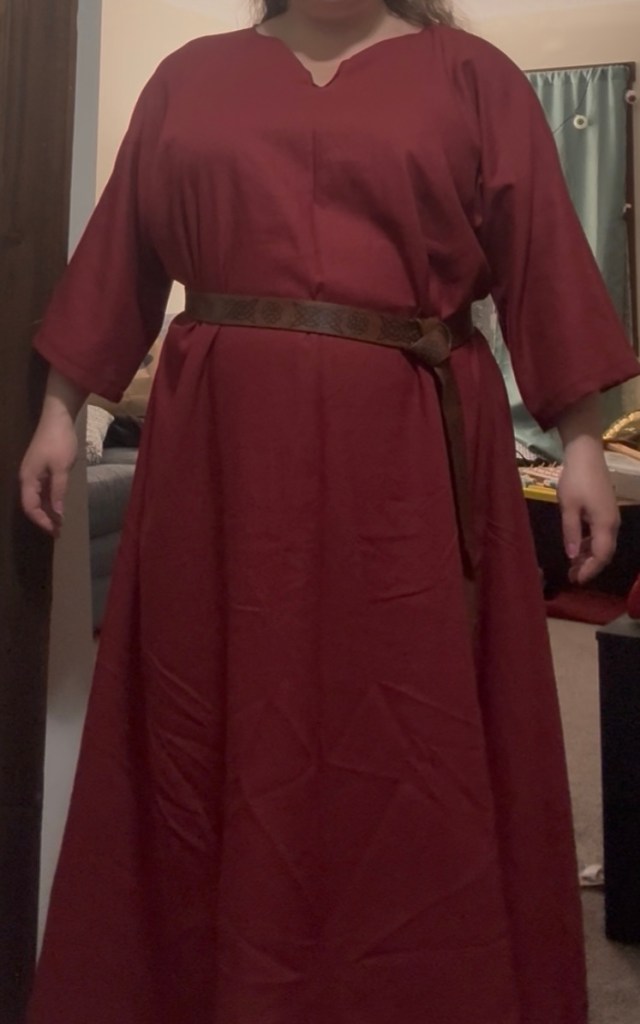
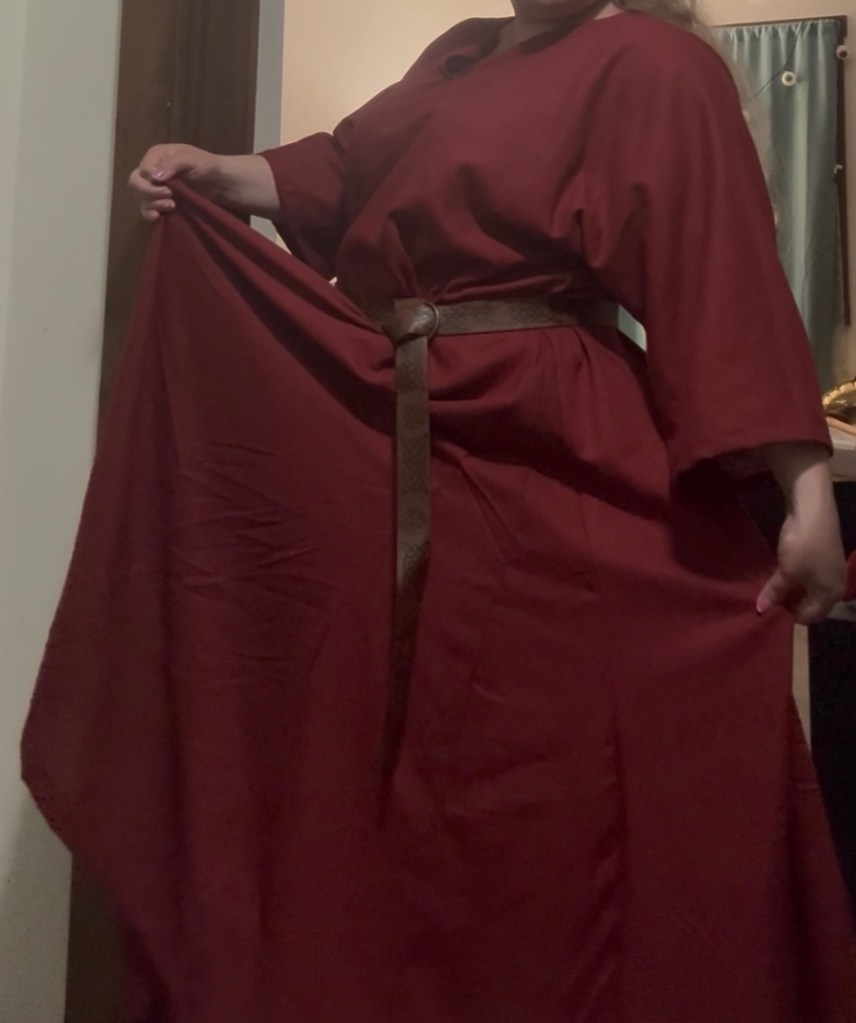
Now if you’ve gotten this far and you are totally and completely lost that is ok! Drop a comment or question and I’ll try and help you. Or maybe my vibes based sewing doesn’t work for you, that’s also totally fine. There are hundreds of different methods to sewing functional garments (and a LOT that will get you closer to a perfect garment than mine ever will).


Leave a Reply